
How to Drill, Grind & Finish Stabilized Mammoth Tooth for Knife Handles — a Noblie Custom Knives Maker Guide
05.19.2026
Walk through any custom knife show and you will hear the same words again and again at the handle materials tables: mammoth tooth, mammoth tusk, walrus tusk, whale vertebra. These fossil materials carry tens of thousands of years of history, and on a finished knife they read as nothing else can — it is no accident that workshops like Noblie Custom Knives build collector-grade blades around them. But there is a reason experienced makers talk about these materials with a certain respect. Fossil ivory and fossil tooth are not forgiving like stabilized burl. They reward patience and punish shortcuts.
This guide covers the part of the job that actually decides whether the material survives: drilling, grinding, crack control, and finishing. It is written for makers who already own a fossil blank and want to turn it into a clean handle without losing the piece on the drill press. If you would rather skip the trial and error, FossilUSA stocks stabilized mammoth tooth scales and stabilized mammoth tusk scales already cut, paired, and ready to mount.
Mammoth Tooth vs Mammoth Tusk: Two Very Different Materials
Knifemakers often group these together, but they behave nothing alike on the bench, and understanding the difference is the first step to not ruining a blank.
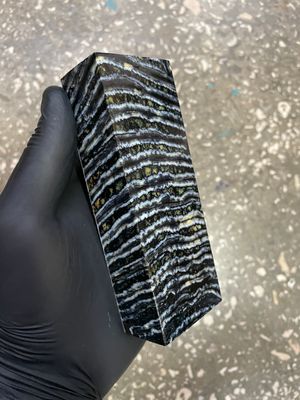
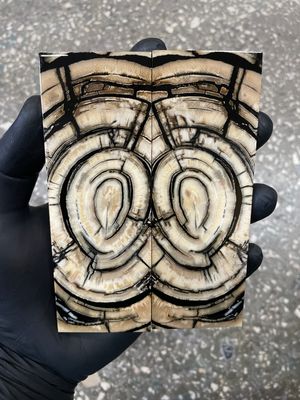
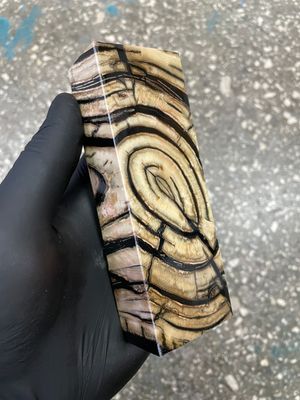
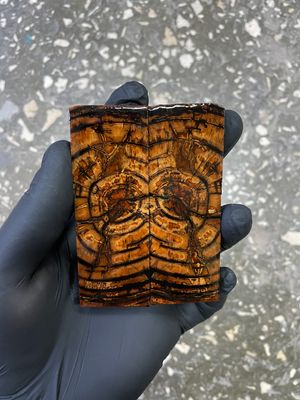
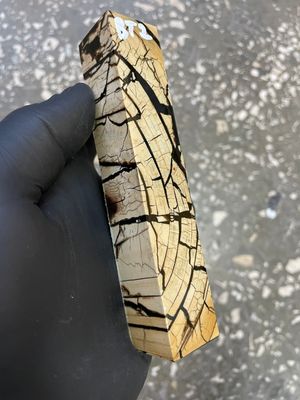
Mammoth tooth is the difficult one. It is not a uniform material. Hard enamel-like ridges alternate with softer bone-like tissue, and that contrast runs all the way through the piece. A drill bit moving through tooth meets a constantly changing density, which is exactly why it wants to wander, skip, or chip. The same uneven structure is what produces those striking layered patterns collectors love — the bands you see on a finished handle are the same bands that make machining a test of nerves.
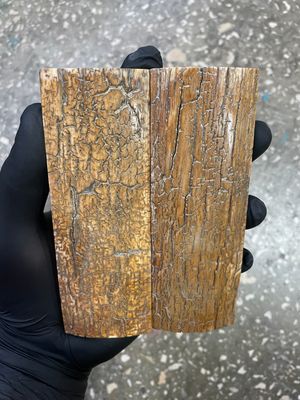
Mammoth tusk is far more cooperative. Fossil ivory has a homogeneous structure, so it cuts, files, and sands evenly. How brittle a given tusk blank feels depends on its state of preservation and the ground conditions it spent the last several thousand years in. Some pieces are crisp and almost glassy; others machine almost like a dense hardwood. Either way, a tusk blank rarely fights you the way tooth does.
The practical takeaway: if this is your first fossil handle, start with tusk. If you are set on tooth, slow everything down and read the next section twice.
Why Stabilized Fossil Material Changes the Job
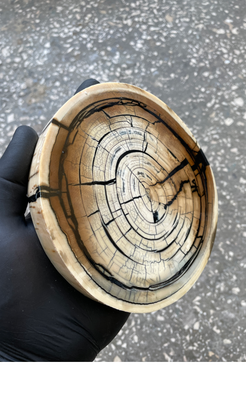
Raw fossil tooth and tusk are porous, and after thousands of years in the ground they often carry internal cracks and voids that are invisible until the blank is opened up. Mounted as-is, that material can keep moving, flaking, or splitting long after the knife is finished.
Stabilization solves most of this before you ever touch the blank. Under vacuum and pressure, resin is driven into the pore structure and then heat-cured solid, so it becomes part of the material rather than a surface coating. A properly stabilized fossil blank is denser, far less reactive to humidity, and much more predictable under a drill bit — the same vacuum-and-pressure principle FossilUSA walks through in its step-by-step stabilization guide. It still has the natural pattern and character — stabilization does not hide the fossil, it protects it.
This matters for machining specifically: a stabilized blank holds its loose flakes together long enough for you to get a clean cut. An unstabilized one can crumble at the drill exit no matter how careful you are. Everything below assumes you are working stabilized material.
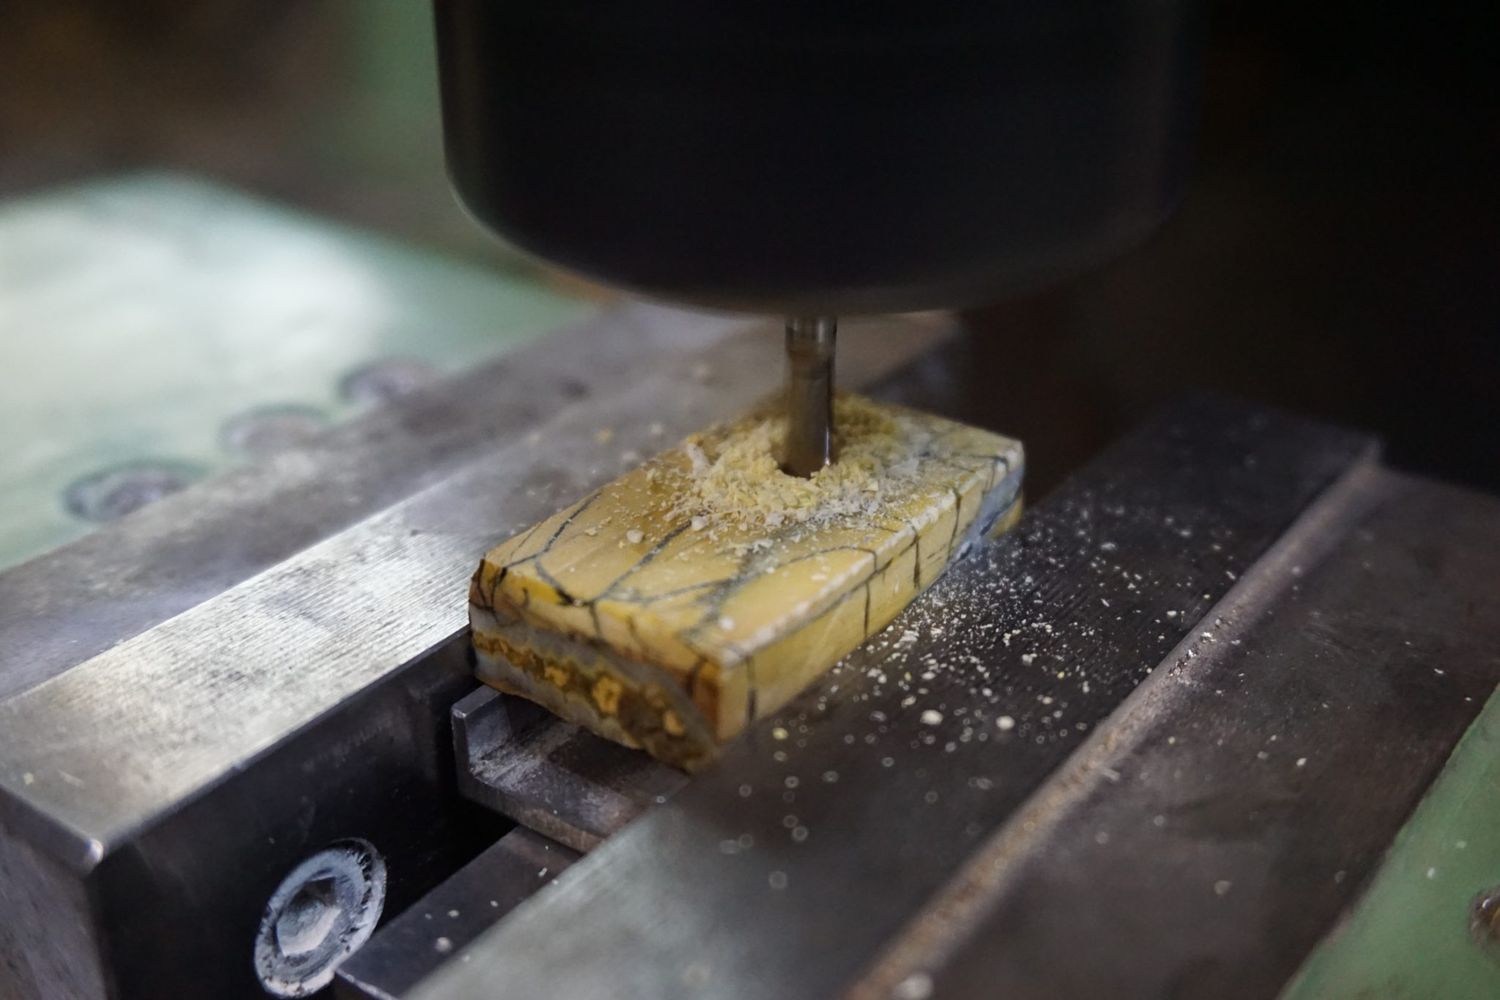
Drilling Mammoth Tooth and Tusk Without Chipping
Drilling is where most fossil blanks are lost. The goal is simple to state and hard to do: get a clean hole through the material while minimizing chip-out, especially where the bit exits.
Bit choice and speed
Use a carbide-tipped bit. Tooth in particular alternates hard and soft zones, and a standard HSS twist bit will deflect off the hard layers or simply refuse to cut the enamel. Many makers reach for inexpensive carbide-tipped bits for exactly this reason — if a tip chips, it is no great loss. Tile-and-glass drill bits work well too and are a popular, budget-friendly alternative that some makers find easier on both tooth and tusk.
Run high RPM and clear the dust frequently. High speed keeps the bit from binding inside the blank. A bound carbide bit is the classic way to split a piece in two: the bit grabs, torque spikes, and the blank cracks along its weakest plane. Pause often, lift the bit, and clear the fine fossil powder before it packs into the flutes.
Backing up thin scales
For a through-tang or hidden-tang build, drilling a thick block is manageable. Drilling a thin scale — say 10 mm or less for a full-tang knife — is where chip-out is almost guaranteed at the exit side.
The fix is a sacrificial backer. Glue a thin piece of G10 or linen micarta (roughly 1 mm) to the back of the scale with superglue before drilling. As the bit breaks through, the backer holds the fossil flakes in place instead of letting them blow out. You can mount the scale to the knife with the backer still attached and grind it away later during handle shaping. If you remove the backer too early, the chips at the hole have nothing to hold onto and will simply fall away. Painter's tape works in a pinch, but a rigid backer is far more reliable. Honestly, drilling a thin fossil scale completely chip-free without a CNC router is rare even for experienced makers — the backer is what keeps it acceptable.
Drilling thick blocks
Larger tooth and tusk blocks are easier. Mark every face and lay out the tang projection on the block. Then drill from each side, going slightly past the halfway point. The two holes meet inside the material, and because neither bit ever exits through an open face, you avoid most of the catastrophic exit chipping — no backing or taping required.
If the blank splits
It happens, even to careful makers. If a blank cracks during drilling, do not throw it out. Clamp the two halves back together, lined up exactly along the fracture, and bond them with superglue. A good cyanoacrylate bond on a clean fresh break is genuinely strong — it holds as well as casting resin or the stabilizing compound itself, and once the handle is shaped the repair is usually invisible.
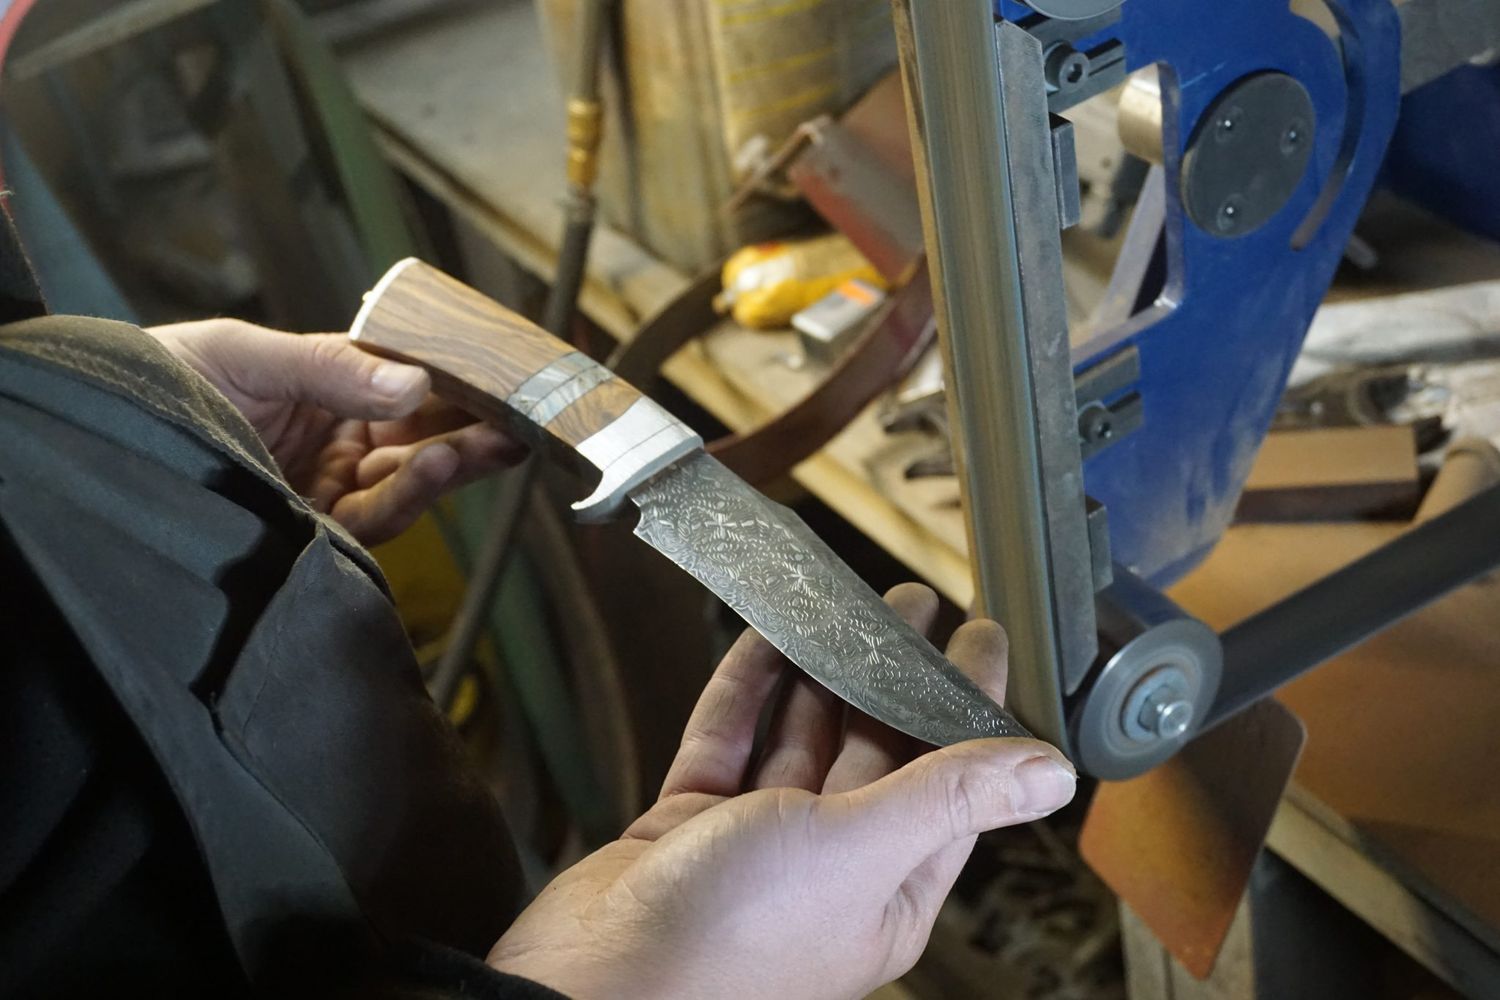
Grinding and Shaping the Handle
Trying to shape fossil tooth by hand is, in the words of one maker, about as practical as cutting down a redwood with a coping saw. You need powered abrasives. A belt grinder is ideal, a disc sander is fine, and at minimum a hook-and-loop sanding disc on a drill will get you there.
Start with a coarse belt — around 40 grit — for bulk removal only. This stage is just about getting rid of excess material and roughing the profile. As you approach the final handle shape, step down to 60 or 80 grit. Finer grit is not only about smoothness here: a smaller abrasive grain is less likely to tear a large chunk out of the fossil. As the belt gets finer you can ease off the speed, and you should always watch two things — heat and belt wear. Fossil material does not like to get hot, and a worn belt generates heat without cutting. There is no universal feed rate or speed chart for this; it is done by eye and by feel.
Once the shape is established, switch to a fine-cut file to knock down the coarse grinder marks before you move to hand sanding. A file with fine teeth removes the deep scratches without grabbing.
Crack Control: Superglue Is Your Best Friend
No matter how careful you are, small cracks and surface fissures will appear as you grind into a fossil blank. This is normal. Even stabilized material has its own internal map of old stress lines, and shaping exposes them.
The standard fix is thin cyanoacrylate. As cracks and small voids show up, flood them with superglue. If the glue keeps wicking down into the material, keep adding more until it stops — you are filling the void from the inside. Let it cure, then continue shaping. On a difficult piece you may go through this fill-and-grind cycle several times before the surface stays clean, and that is simply the cost of working fossil tooth. It is not a sign you did anything wrong.
Finishing and Polishing — Where Tooth and Tusk Differ Again
This is the second point where the two materials part ways, and getting it wrong shows on the finished knife.
Finishing mammoth tooth
Because tooth is made of alternating hard and soft zones, it wears unevenly when sanded. The softer bone-like tissue abrades faster than the hard dentin, and if you sand with a soft backing you end up with a gently rippled or "wavy" surface — the soft bands sink below the hard ones. To avoid this, always sand mammoth tooth with a hard backing block behind the sandpaper. The rigid block keeps the abrasive cutting on one flat plane so the hard and soft zones come down level together.
Finishing mammoth tusk
Tusk is uniform, so it does not wave. After grinding you can move straight to a file, then to sandpaper, working up from around 100 grit. Fossil ivory polishes beautifully — work up to roughly 800–1000 grit, then finish on a felt wheel with polishing compound. Many makers use a quality bar compound and report a clean, durable shine with no issues over years of use.
Sealing and care
A common approach is to apply Danish oil before the final polish, letting it soak into the material as deeply as it will go. The polishing step then closes the surface pores and buffs away any excess oil. The result is a warm, sealed surface that shows the natural color and pattern of the fossil at its best.
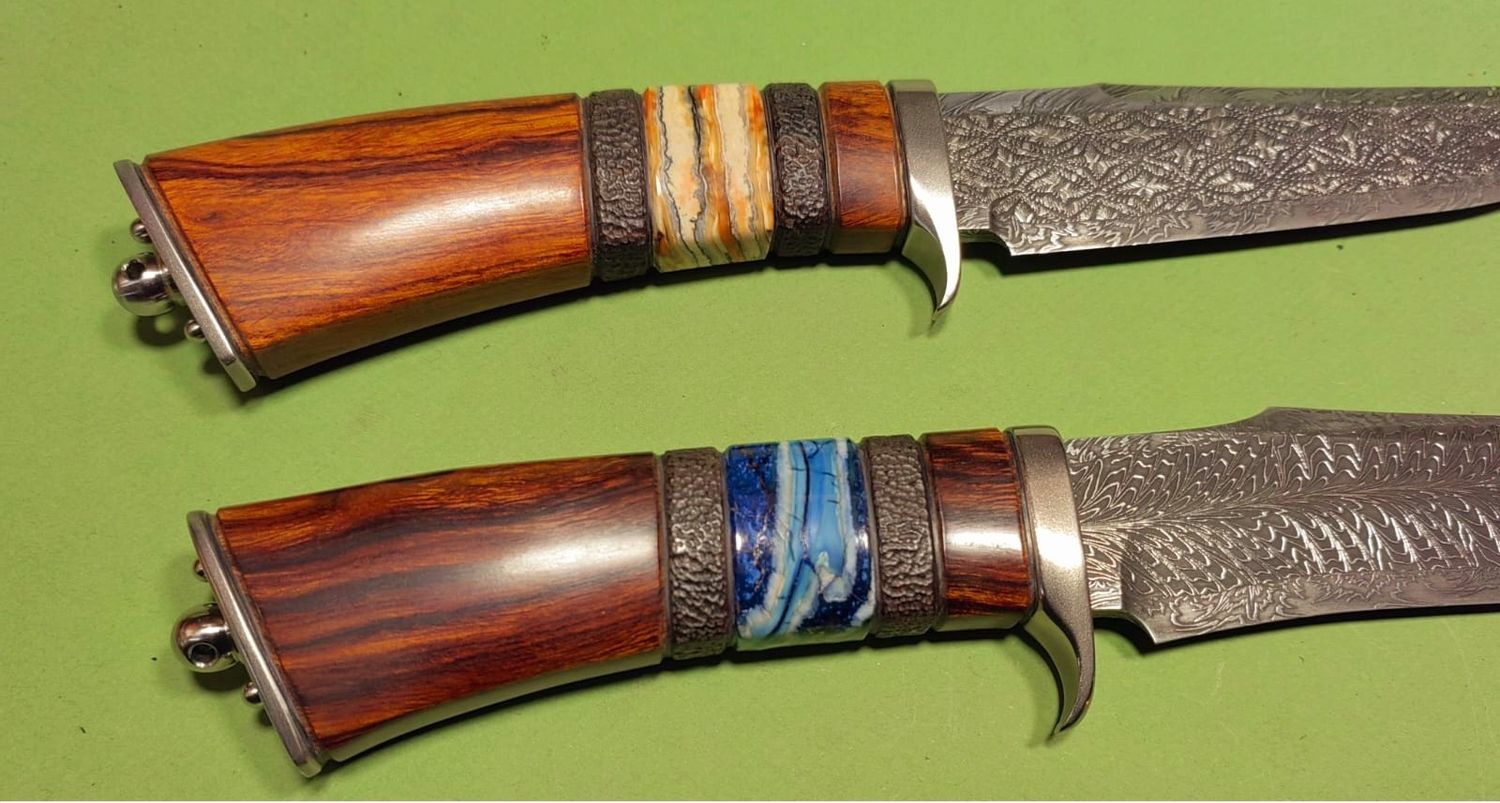
Where Stabilized Fossil Materials Shine on Finished Knives
Fossil tooth and tusk are most at home on fixed-blade knives, where a generous handle gives the material room to display its pattern and where a stout build suits its premium, collectible character. They pair especially well with patterned blades — the organic banding of mammoth tooth alongside the flowing layers of forged steel is a combination that has defined high-end custom knives for decades.
You can see that pairing done at a professional level in the Damascus knives collection, where fixed-blade builds regularly feature handle elements like stabilized mammoth tooth and whale vertebra set against hand-forged Damascus steel. It is a useful reference point for any maker thinking about how to frame these fossil materials in a finished design — and a reminder that the careful drilling and finishing work above is what makes that level of result possible.
Beyond mammoth tooth and tusk, the same machining principles carry over to other fossil handle materials. Stabilized whale vertebra and walrus tusk reward the same patient, backed, slow-and-cool approach.
Quick Reference: Working Stabilized Fossil Material
• Drill bit: carbide-tipped, or tile/glass bits. High RPM, clear dust often.
• Thin scales: glue a G10 or micarta backer before drilling; remove it later.
• Thick blocks: drill from both sides so the holes meet inside.
• Split blank: realign on the fracture and bond with superglue — it holds.
• Grinding: 40 grit for bulk, 60–80 as you near final shape; watch heat.
• Cracks: flood with thin superglue, cure, repeat as needed.
• Mammoth tooth finishing: always use a hard sanding block to avoid waves.
• Mammoth tusk finishing: file, then sand 100→1000 grit, then buff.
• Care: Danish oil before final polish.
Skip the Sourcing — Start with Ready Fossil Scales
Finding sound fossil blanks, judging their condition, and stabilizing them correctly is a project in itself. If you would rather spend your time at the grinder than hunting material, FossilUSA stocks fossil handle material that is already selected, stabilized under controlled conditions, and cut to usable sizes.
See the full range in the FossilUSA catalog, and browse the Maker Gallery for finished knives built with these materials.
👉 Browse current stock:
Catalog:
FossilUSA
Premium stabilized materials for knife making
Contact:
dimafan777@gmail.com


Secure Payments
PayPal · Visa · Mastercard